Easy Samoa Rice Krispie Treats Recipe
Samoa Rice Krispie Treats are the kind of dessert that brings instant smiles. If you’ve ever loved those iconic coconut-caramel-chocolate cookies, you’ll get why this recipe is a winner. We’re taking the best parts of that cookie – the toasted coconut flavor, the chewy texture, and the sweet caramel notes – and mixing them into a no-bake treat that’s even easier to make. It’s the perfect way to get that beloved Samoa taste without turning on the oven, making them ideal for hot summer days or when you just need a quick, satisfying sweet. The magic really happens when you combine the crispy cereal with the richness of dulce de leche and the satisfying chew of shredded coconut. This recipe captures that delicious essence in every bite, offering a familiar yet exciting twist on a classic snack.
Samoa Rice Krispie Treats
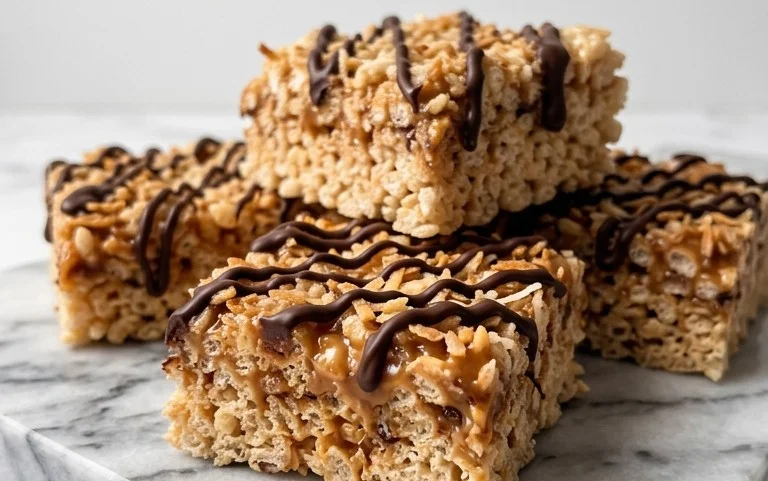
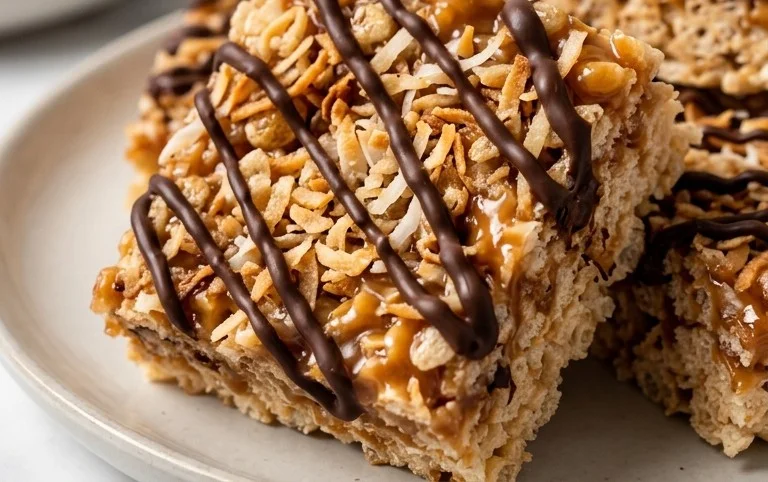
These Samoa Rice Krispie Treats capture all the delicious flavors of the beloved cookie in a chewy, gooey, no-bake treat. We’re talking about that irresistible combination of toasted cereal, chewy coconut, sweet dulce de leche, and rich chocolate. They’re incredibly simple to make, making them perfect for an afternoon snack attack, a potluck, or even a fun baking project with kids. The key to getting that authentic Samoa flavor is the combination of shredded coconut and the caramel-like dulce de leche, which really mimics the toasted coconut and caramel filling of the cookie.
Ingredients:
- 5 cups mini marshmallows
- 3 TBS butter
- 6 cups Rice Krispie cereal
- 14 oz bag sweetened shredded coconut
- 2 TBS milk
- 1 (13.4 oz) can dulce de leche
- 6 oz semisweet chocolate (melted)
Cooking Instructions
Step 1: Preparing the Base
First things first, let’s get our pan ready. You’ll want to grease a 9×13 inch baking pan. A light coating of butter or non-stick cooking spray works perfectly. This prevents our sticky treats from clinging to the pan, making them much easier to handle and cut later on. Next, in a large saucepan, melt the butter over low heat. We want it completely melted and smooth. Once the butter is melted, add the mini marshmallows. Keep the heat on low – this is important. If the heat is too high, the marshmallows can scorch, and we don’t want any burnt bits in our treats. Stir the marshmallows constantly until they are completely melted and smooth. This process usually takes about 5-7 minutes. Patience here will pay off with a better texture.
Step 2: Incorporating the Cereal and Coconut
Now that we have a beautifully smooth marshmallow mixture, it’s time to add the dry ingredients. Take the saucepan off the heat. Immediately add the 6 cups of Rice Krispie cereal to the melted marshmallow mixture. Gently fold the cereal into the marshmallows until it’s evenly coated. Don’t overmix, as this can crush the cereal and result in a denser treat. We want those airy, crispy textures. Once the cereal is mostly coated, it’s time to add the star of our Samoa flavor: the sweetened shredded coconut. Sprinkle in the entire 14-ounce bag of sweetened shredded coconut. Fold this in as well, making sure to distribute the coconut throughout the cereal mixture. The combination of the slightly sticky cereal and the sweet coconut is what starts to build those familiar Samoa flavors.
Step 3: Adding the Dulce de Leche Swirl
This is where things get really interesting and truly capture the essence of a Samoa cookie. After you’ve folded in the coconut and cereal, gently stir in the 2 tablespoons of milk. This little bit of liquid helps to make the mixture a bit more pliable and creates a smoother consistency. Now, take your can of dulce de leche. You don’t need to stir it in completely. Instead, dollop spoonfuls of the dulce de leche over the cereal and marshmallow mixture. Then, using a spatula or a knife, gently swirl the dulce de leche into the mixture. You want streaks and pockets of dulce de leche, not a uniform color. This swirling creates those lovely caramel-like ribbons that are so characteristic of Samoa cookies. Don’t over-swirl, or you’ll lose the visual appeal and the distinct caramel bites.
Step 4: Pressing the Treats into the Pan
Carefully spoon the mixture into your prepared 9×13 inch baking pan. It will be sticky, so using a greased spatula or your greased hands (lightly buttered or sprayed) will help immensely. Press the mixture evenly into the pan. You want a compact layer, but again, don’t press too hard, as this can make the treats tough. A gentle, even pressure is key. Take your time with this step to ensure you have a nice, flat surface for the chocolate drizzle later. Once it’s pressed in, you can go back over any uneven spots with your greased spatula to smooth them out.
Step 5: The Chocolate Drizzle Finish
Finally, it’s time for the chocolate topping. Melt the 6 ounces of semisweet chocolate. You can do this in the microwave in 30-second intervals, stirring in between, until smooth. Alternatively, you can use a double boiler. Once the chocolate is melted and smooth, drizzle it all over the top of the Rice Krispie treats. You can use a fork or a spoon to create zig-zags or a random pattern. This chocolate layer is the final touch that brings the Samoa cookie inspiration full circle. Let the chocolate set at room temperature for about 30 minutes, or speed it up in the refrigerator for about 10-15 minutes. Once the chocolate is firm, cut the treats into squares. For the cleanest cuts, use a sharp knife and wipe it clean between cuts if needed. These treats are best enjoyed at room temperature. Store any leftovers in an airtight container at room temperature for up to 3 days.
Conclusion:
These Samoa Rice Krispie Treats are a fantastic way to enjoy those beloved cookie flavors in an easy, no-bake format. They bring together the crispy cereal, chewy coconut, sweet dulce de leche, and rich chocolate for a treat that’s incredibly satisfying. They’re simple enough for kids to help make and impressive enough for any party. For serving, they’re great cut into squares for easy handling, or you can even try pressing them into fun shapes with cookie cutters before they fully set. If you’re looking for a variation, try adding a pinch of sea salt on top of the chocolate drizzle to enhance the flavors, or use milk chocolate instead of semisweet for a sweeter profile. Don’t be afraid to experiment!
Frequently Asked Questions:
Can I use a different type of marshmallow?
You can use regular-sized marshmallows, but you’ll need about 10-12 ounces of them instead of the 5 cups of mini marshmallows. They melt similarly, just give them a little extra stirring time. Make sure they’re fully melted and smooth before proceeding.
How do I store Samoa Rice Krispie Treats?
Store them in an airtight container at room temperature for up to 3 days. If you stack them, place parchment paper or wax paper between layers to prevent sticking. They don’t need to be refrigerated, as that can make them too hard and stale.
What if I can’t find dulce de leche?
Dulce de leche is key for that caramel flavor, but if you can’t find it, you can try using a good quality caramel sauce. It won’t be exactly the same, but it will still provide a delicious caramel element. You might need to reduce the milk slightly if the caramel sauce is very thin.
Samoa Rice Krispie Treats
A delicious twist on classic Rice Krispie treats, inspired by the flavors of Samoa cookies.
Ingredients
-
5 cups mini marshmallows
-
3 TBS butter
-
6 cups Rice Krispie cereal
-
14 oz bag sweetened shredded coconut
-
2 TBS milk
-
1 (13.4 oz) can dulce de leche
-
6 oz semisweet chocolate, melted
Instructions
-
Step 1
In a large saucepan, melt butter over low heat. Add marshmallows and stir until completely melted and smooth. -
Step 2
Remove from heat. Stir in the sweetened shredded coconut and milk until well combined. -
Step 3
Add the Rice Krispie cereal and stir until evenly coated. -
Step 4
Press the mixture evenly into a greased 9×13 inch baking pan. -
Step 5
Drizzle the dulce de leche generously over the top of the treats. -
Step 6
Drizzle the melted semisweet chocolate over the dulce de leche and coconut mixture. -
Step 7
Allow to set for at least 30 minutes before cutting into squares.
Important Information
Nutrition Facts (Per Serving)
It is important to consider this information as approximate and not to use it as definitive health advice.
Allergy Information
Please check ingredients for potential allergens and consult a health professional if in doubt.